The couch I own is of the pleather
variety. When I originally bought it I was not thinking of my pet, which is of
the feline variety. Tuvan’s front paws are declawed; however his back claws are
not, turning them into weapons of mass destruction. He has gone all “Valentine’s
Day Massacre” on my couch; so to protect my couch
from further damage from public enemy # 1, I decided to slip cover the couch
cushions.

Here is my tutorial on how to make
a boxed cushion cover. If you have any questions just ask and I will try to do
my best to answer them. So let’s do this thing!
What you will need:
-Fabric (The amount of yardage will depend on how many cushions you are covering. You can Google a yardage calculator to make life easier.)
-Measuring Tape
-Pen
-Cup
-Thread that matches your fabric
-Sewing Machine
-1/2 inch seam allowance
Step 1:
-Lay out your fabric. I use my living room floor to do this because I have more space.
-The seam allowance is 1/2 inch. I did this because 1/2 inch is easy to find on the measuring tape. Also whatever you come up with when you measure your cushion, you will add one inch to it, half an inch for either side of the cushions seam allowance. With me so far?
-Make sure you have the wrong side of the fabric facing up, because this is where you are going to do all of your pen marks so that they will be hidden within the seams.
-Using your measuring tape, measure 8 inches vertically. Then using your measuring tape as a straight edge, make a line the width of the fabric. Like so:

And so:

-You will make two of these strips.
-Then you will fold one strip in half
-With your fancy dancy, oh so technical pen, you will then make a line across the middle of the strip. If you are really careful you won't have to do it the whole width. Just a tip from me to you, however if it makes you feel better to draw the line across the width of the whole strip, you are welcome to do it.
-To help you visualize how this slip cover is going to look, think if an ice cream sandwich :) You have a top and bottom crust and then the middle.
What would you do for a Klondike Bar?

-Now, measure the width and length and circumference of your cushion.
Like So:

And so:

And so:

(I Did the first step backwards, I already knew that the width of the middle was 8 inches, if you have the same style of cushion it will be similar.) If not that is OK, just measure and this will determine height of your strip. I am assuming that you will read the instructions all the way through before starting this project. So eazy peazy lemon squeezy, no sweat, chill.
-When you know the length and and width and height of your cushion you can take those measurements and cut them out of your fabric, like so:

(So now you should have a top, bottom and middle to your ice cream bar)
Now things are about to get technical, so brace yourselves.
Remember that glass cup that is in the items needed? (In my house glasses are for drinking out of AND for projects) I suppose you could use a bowl for larger curves on bigger cushions.
-Trace around the curve of the glass. DO NOT CUT ANYTHING! This is just to mark out where you will follow with your sewing machine. If you do not have curved edges on your cushion, you can skip this step.

And so:

So lets go over what you should have now:
-Top and Bottom? Check.
-Two strips the height and width of your cushion for the circumference to you cushion? Check.
-One strip cut in half down the middle? Check.
We good? Let's go on over to the sewing machine.
-So remember the strip you cut in half? You are going to hem one side of each of the strips with......you guessed it: a half inch seam. Like so:

And it should look like so:

-Now take the strips that you cut in half and slightly overlap the finished edges and pin one side, this will help keep the two sides from slipping.
-Then attach the strip you cut in half and hemmed to the uncut strip like so:
-Now you should have one long continuous strip. OK, are you good?

-Take one of the sides to your ice cream sandwich. The seam you just sewed, making one long continuous strip, you are going to place that about 10 inches in from the edge of the top.
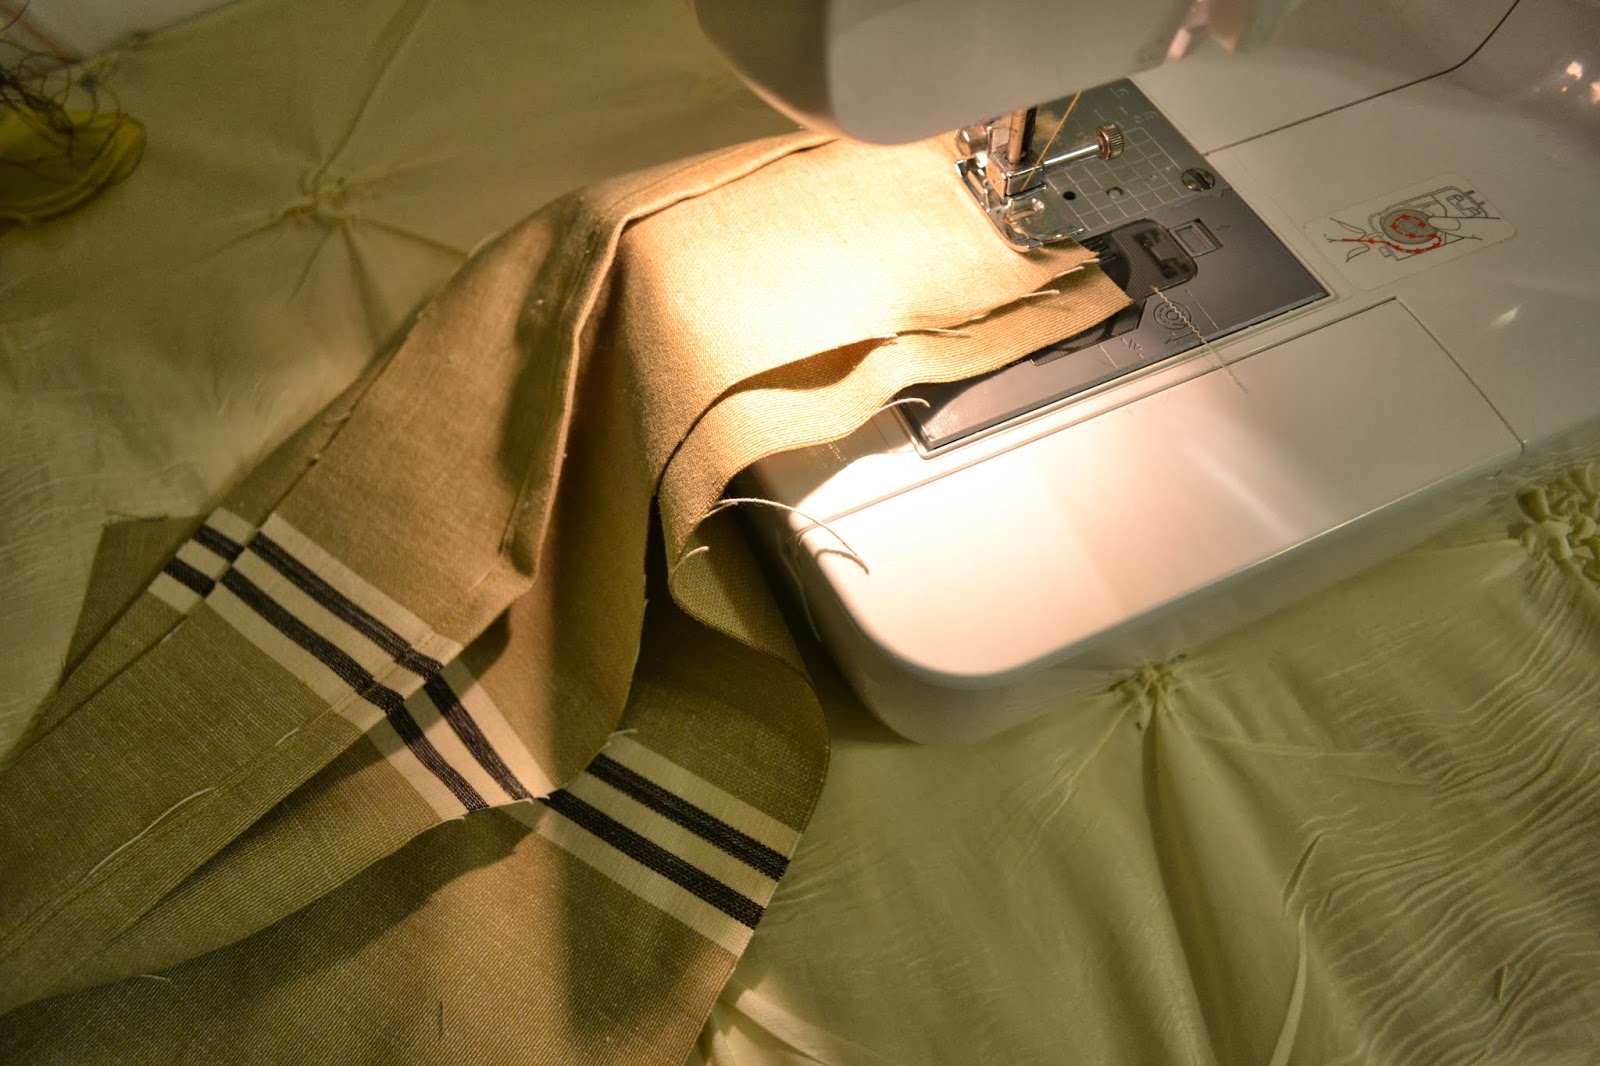
-Now stitch half an in attaching the strip to the top, go slow and take your time.
-When you get to your first curve, follow the curve that you traced, slowly, forming the strip to the curve. Like so:


If you go slowly you will avoid having to rip any seams.You will do the same when you get to the next curve. Just take your time, the end product is the goal, not speed.
When you get to the corner, leave your needle down and lift your presser foot. You don't want to lift the needle because that is holding your fabric in place. Pivot your fabric, straighten out any bumps in the fabric if they appear. Like so:


-Do not attach the strip all the way to the end, leave a portion un-sewn at the end of the strip, this will get sewn in the final seam once you have added the other side on.
You will repeat these same steps to add the other side of the cushion. Just chill, you got this.
Your top and bottom should be attached with the strip in the middle. There should be a section where you started both sides of your cushion and the two end of the strip that are not completely joined. Take the two ends of the strip and thew them together. The same way you attached the strips a couple steps back.
-Sew the remaining sides of the strip to the top and bottom of your cushion. Are you good?
Now you are going to add the oh so ubber scary Velcro....just kidding.
You are going to cut your Velcro into three sections, making for a total of six pieces, three top, three bottom.
-The strip that you cut in half in the very beginning of this arduous journey is the opening for your cushion. Perhaps there is now light at the end of the tunnel?
-Take three of the matching pieces of Velcro and attach it to the right side of one of the strips. You will sew down each piece of Velcro twice, to make sure each piece is sturdily in place. Like so:


You will do the same for the other side but on the inside of the strip like so:

-Flip your cushion cover right side out.
You should have a cushion that looks like this:

Here is my couch so far. I have one more cushion cover to make.

The only thing I wish I would have done is lined up the strips in the fabric. However, I am satisfied with how the cushions are turning out, and the ultimate goal was to protect the couch from Tuvan's needle claws.
I hope you enjoyed the tutorial. E-mail me or comment if you have any questions.
No comments:
Post a Comment